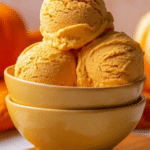
High Protein Pumpkin Ice Cream (Ninja Creami Option) Recipe
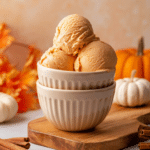
This High Protein Pumpkin Ice Cream recipe is a deliciously creamy and nutritious treat perfect for pumpkin lovers looking to enjoy a healthy dessert. Using dairy-free milk and protein powder, this ice cream offers a high protein content while remaining low in sugar, especially when sweetened with monk fruit sweetener. The recipe provides two preparation options: using a Ninja Creami machine or a food processor, making it versatile and accessible. Flavored with warm pumpkin pie spice and cinnamon, this ice cream is an ideal autumnal dessert or a guilt-free snack.
- Prep Time: 10 minutes
- Cook Time: 0 minutes
- Total Time: 24 hours 10 minutes (includes freezing time)
- Yield: 4 servings 1x
- Category: Dessert
- Method: Freezing (Ninja Creami Processing or Blending Frozen Cubes in Food Processor)
- Cuisine: American
- Diet: Low Fat
Ingredients
Scale
Base Ingredients
- 12–14 oz unsweetened almond milk (or any other dairy-free milk)
- 1–2 tbsp Greek yogurt (optional, but makes it creamier)
- 1/2 cup canned pumpkin puree (not pumpkin pie filling)
- 1 scoop vanilla protein powder (about 3 tbsp)
- 2–3 tbsp powdered monk fruit sweetener (for low sugar and low carb) OR honey/maple syrup
- 1 teaspoon vanilla extract
- 1 teaspoon pumpkin pie spice
- 1/4 teaspoon cinnamon
- Pinch of salt
Optional for Serving (Ninja Creami Re-spin)
- 1–2 tbsp coconut milk
Optional for Food Processor Method
- 1/4–1/3 cup coconut or almond milk (for blending the frozen cubes)
Instructions
- Mix Ingredients: In a blender, combine the almond milk, Greek yogurt (if using), pumpkin puree, vanilla protein powder, monk fruit sweetener or honey/maple syrup, vanilla extract, pumpkin pie spice, cinnamon, and a pinch of salt. Blend everything until the mixture is smooth and well combined.
- Freeze for Ninja Creami: Pour the blended mix into a Ninja Creami pint container, making sure it does not exceed the MAX FILL line and that the juice covers the fruit. Seal the container with the lid and freeze it for at least 24 hours to allow the mixture to harden sufficiently.
- Process in Ninja Creami: After freezing for 12-24 hours, remove the container from the freezer and install the pint into the Ninja Creami machine. Process the mixture using the “light ice cream” setting to achieve a creamy texture.
- Optional Re-spin for Creaminess: If the ice cream is not smooth enough after the first process, push a knife down the middle of the container to create a small hole. Add 1-2 tablespoons of coconut milk through this hole and re-spin the ice cream for additional creaminess. This step is optional if the texture is already satisfactory.
- Alternative Freezing Method (Food Processor): For those without a Ninja Creami, pour the blended mixture into ice cube trays and freeze for 24 hours until solid.
- Blend Frozen Cubes: Once frozen, place the pumpkin ice cream cubes into a food processor. Add 1/4 to 1/3 cup of coconut or almond milk to help blend the cubes until smooth and creamy. You may need to pause occasionally to scrape down the sides for even blending.
- Adjust Consistency: If the ice cream is too thick or not creamy enough, add more coconut or almond milk gradually and continue blending until the desired consistency is reached. Serve immediately.
Notes
- Using Greek yogurt is optional but helps increase creaminess and adds a tangy flavor.
- For a lower sugar and carb version, use powdered monk fruit sweetener instead of honey or maple syrup.
- Make sure not to exceed the MAX FILL line in the Ninja Creami pint container to avoid processing issues.
- If you don’t have a Ninja Creami machine, the food processor method is an effective alternative.
- Add coconut milk during re-spin or food processor blending to improve texture and creaminess.
- Use canned pumpkin puree, not pumpkin pie filling, for best results and appropriate flavor.
- The recipe can be customized with other protein powders or spices based on preference.
Keywords: high protein pumpkin ice cream, low sugar pumpkin dessert, Ninja Creami pumpkin ice cream, healthy pumpkin ice cream, dairy-free pumpkin dessert, protein powder dessert